Setting Up a Free Virtual Security Lab
Building a cybersecurity lab on a low-powered laptop might seem challenging, but with the right setup and optimizations, you can still create an effective environment for security testing and learning. This guide walks you through setting up VMware Workstation Pro, configuring your virtual machines (VMs), and ensuring a secure testing network.
For this setup, I decided to start with VMware Workstation Pro on my Windows machine. The GUI-driven interface makes it easier to navigate and understand virtualization concepts. Luckily, Workstation Pro was available for free, making it a great option..
To download the Windows version from the VMware Workstation Pro website. I had to
- click on the blue download Fusion or Workstation button.
- At the top of the new page click login
- Select option to register.
- Once registered, go to My Downloads.
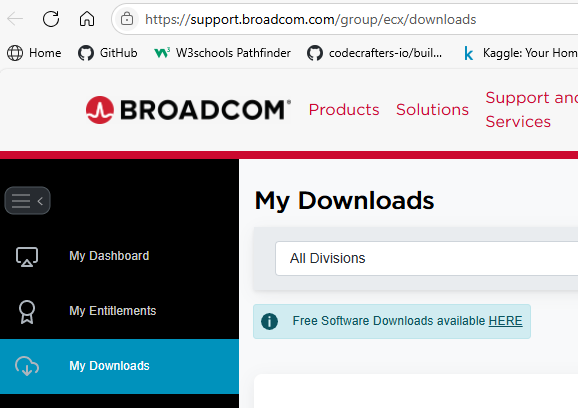
- The blue ‘Free Software Downloads available HERE’.
- I downloaded the Workstation Pro.
The installation was very typical. Once it’s installed, you’ll be able to create and manage virtual machines directly from your Windows system.
However, for those looking for alternatives, Oracle VirtualBox is another excellent choice. It's open-source, free, and widely used for virtualization. If your laptop struggles with VMware, VirtualBox might be a lighter solution to explore.
Download ISO files for VM.
I decided to go with Kali Linux for the attack machine. I downloaded the ISO for Kali here Get Kali | Kali Linux. They have an option for VM and you can download the VMware version. Get Kali Virtual Machines.
I used the Ubuntu Server for the vulnerable machine to attack. Get Ubuntu | Download | Ubuntu. I chose the Ubuntu Server to set up the services one at a time and to track logs to see how these events are shown on the server. I set up an OpenSSH-Server and I configured it on another machine. With the server I will set up an ssh server without any configuration and then try to exploit it and analyze the logs. I have downloaded Metasploitable2 and Metasploitable3 for use in the future.
Setting up Virtual Machines
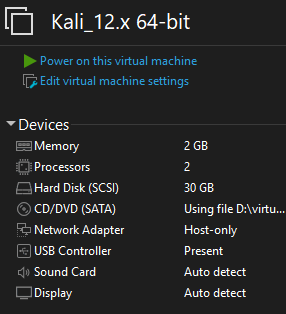
Kali machine: I set up the Kali machine with 30gb of space for the hard drive. I will use this Kali machine and build it out so I gave it some extra space. A common recommendation is to allocate at least twice the ISO file size for your virtual machine. I dedicated 2GB of memory to the machine, and kept the default 2 processors.
Start with NAT to download updates and tools, then switch to Host-Only to attack your vulnerable Ubuntu VM safely.
Here’s a quick breakdown of your options:
- Bridged Network – Connects your VM to the same network as your host machine, making it act like a physical device on your real network (not ideal for security testing).
- NAT (Network Address Translation) – Allows your VM to access the internet but isolates it from direct connections (safer, but not ideal for testing internal attacks).
- Host-Only Network – Limits communication to other VMs within your virtual environment, preventing external access while allowing interaction between multiple test systems (ideal for penetration testing).
- No Network – Totally isolates the VM, which may not be useful for security testing.
Before starting penetration testing, always update Kali Linux using the following commands:
sudo apt update && sudo apt upgrade
sudo apt install -y kali-linux-large
This ensures that your security tools are up to date.
Since you're setting up a vulnerable lab for cybersecurity testing, you can switch back to Host-Only Network on your Kali Machine once you are finished updating the system. This keeps your virtual machine isolated from your main network while still allowing communication between other VMs on the same host, which is perfect for controlled attacks and testing.
Ubuntu Server with SSH
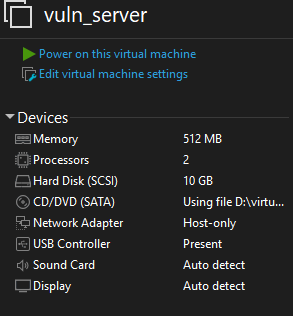
I have this machine with less memory and only 10 GB for the disk.. I could have done less.
I did not update the ubuntu server after installing it. I just installed it and set up the OpenSSH Server. I did no configuration for the ssh I started the service and left it at that. I thought by doing this it would give me an opportunity to look at the ssh server a little closer. Enabling me to see how it logs events when someone accesses or tries to access it. How vulnerable is an ssh server with the default setup. I set up an ssh server and configured it for security here. I plan to configure one thing at a time on the ssh server and see how it improves the security. SSH configuration, exploitation, and log analysis could easily be its own deep dive.
Using Snapshots for Protection
One of the best features of VMware Workstation is the snapshot tool, which lets you create a backup of your VM’s current state.
Before running a risky exploit or making big changes, take a snapshot by:
- Clicking VM > Snapshot > Take Snapshot
- Naming it something meaningful (e.g., "Pre-Exploit Test")
If your system crashes or gets compromised, you can revert to a clean state instantly.
You're right—a strong conclusion will tie everything together and reinforce the purpose of your cybersecurity lab setup. Here's an improved summary and conclusion:
Conclusion
Setting up a cybersecurity lab on a low-powered laptop might seem like a challenge, but with the right approach, you can build a functional environment for testing, learning, and improving security skills. By leveraging VMware Workstation Pro or Oracle VirtualBox, downloading essential Kali Linux and Ubuntu Server ISOs, and carefully configuring networking settings, you create a controlled space for penetration testing and vulnerability analysis.
A well-structured testing lab allows for safe experimentation, helping you understand real-world attacks and defenses. The addition of snapshot functionality ensures that mistakes or compromises don’t set you back, providing a reliable way to restore your virtual machines at any time.
As you progress, continue refining your setup—experiment with new tools, analyze security logs, and explore deeper aspects of cybersecurity. Whether you're focusing on SSH exploitation, network security, or penetration testing, this lab serves as a hands-on learning environment, fostering growth and expertise in the field.
Now that your lab is up and running, what's next? Time to start testing, analyzing, and securing your systems like a pro.

Comments
Post a Comment